Make-Ahead King Ranch Chicken: Cheesy Layers for Busy Families
In the bustling world of modern family life, finding delicious, comforting meals that don't demand hours in the kitchen can feel like discovering a culinary superpower. Enter King Ranch Chicken, a legendary Tex-Mex casserole that has long been a savior for weeknight dinners and potluck gatherings across the Lone Star State and beyond. But what if we told you this beloved classic could be even *more* convenient? The secret lies in its incredible make-ahead potential, transforming a hearty meal into a stress-free staple for even the busiest of schedules. Imagine arriving home after a long day, knowing a bubbling, cheesy, and deeply satisfying King Ranch Chicken casserole is waiting, ready to simply pop into the oven. This article will guide you through mastering this make-ahead marvel, ensuring you have a flavorful, family-approved dish at your fingertips whenever hunger strikes.King Ranch Chicken: A Tex-Mex Legend with a Flavorful Past
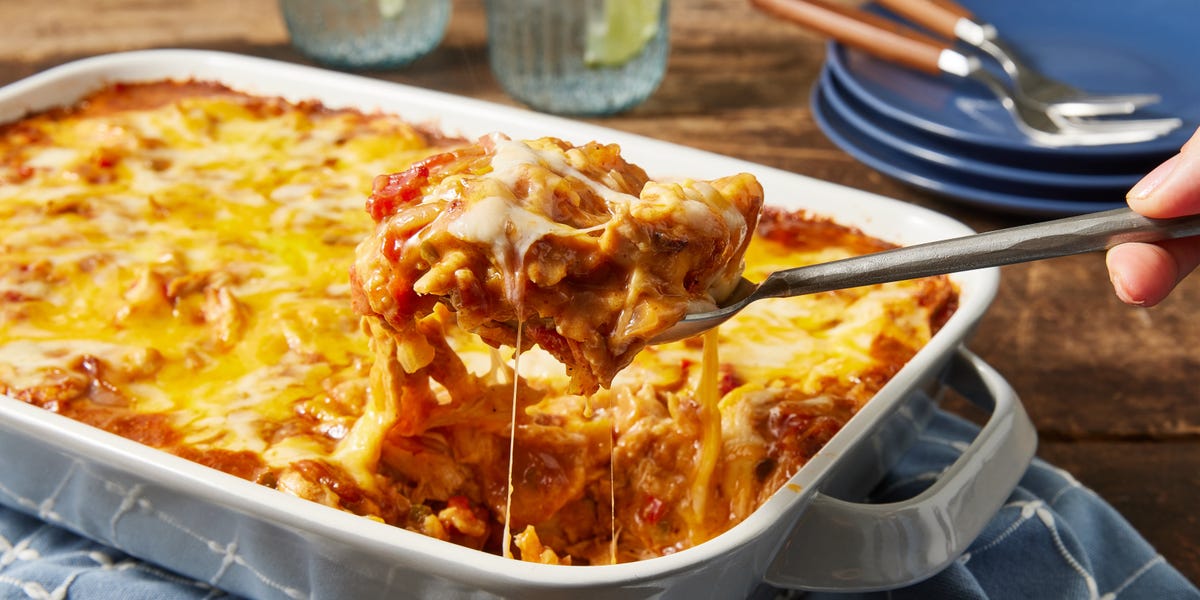
Before diving into the make-ahead magic, let's appreciate the dish itself. King Ranch Chicken is more than just a casserole; it's a culinary hug, a vibrant tapestry of shredded chicken, a uniquely zesty and creamy sauce, layers of tender corn tortillas, and an abundance of melted cheese. It's the kind of dish that brings people together, whether at church suppers, neighborhood potlucks, or simply around your own family dinner table. While its name might suggest an origin from the famous King Ranch in South Texas, the true history of this casserole is a bit fuzzy, shrouded in delightful mystery. Most culinary historians agree it was likely not born on the ranch itself but perhaps in the kitchens of a ladies' Junior League, a testament to its widespread popularity among home cooks. Some even suggest its roots could be inspired by traditional Mexican dishes like chilaquiles, sharing similar foundational elements such as tortillas, salsa, and a protein. Regardless of its exact birthplace, the spicy notes of chili powder, the earthy warmth of toasted cumin, and the kick of roasted peppers and chiles have cemented its status as an enduring Tex-Mex comfort food. To delve deeper into its fascinating background, explore King Ranch Chicken: The Beloved Tex-Mex Classic & Its Fuzzy Origins.Why Make-Ahead King Ranch Chicken is a Weeknight Lifesaver
The beauty of King Ranch Chicken isn't just in its incredible flavor; it's also in its remarkable adaptability, particularly for those looking to reclaim precious time. The make-ahead capability of this casserole transforms it into an indispensable tool for meal planning and stress reduction.- Saves Precious Time: The biggest advantage is undoubtedly time. By assembling the casserole ahead of time – whether a day or even weeks in advance – you eliminate the bulk of the prep work on a busy weeknight. All that's left is to bake and enjoy.
- Reduces Stress: Knowing a homemade, hearty meal is waiting in the fridge or freezer provides immense peace of mind. No last-minute scrambling for ingredients or deciding what to cook when you're already exhausted.
- Deepens Flavors: Like many casseroles and stews, King Ranch Chicken benefits from a little resting time. Allowing the assembled dish to sit, even for a few hours, lets the spices and creamy sauce meld more intimately with the chicken, vegetables, and tortillas, resulting in an even more flavorful experience once baked.
- Perfect for Gifting: A make-ahead King Ranch Chicken casserole is an incredibly thoughtful gesture for new parents, grieving friends, or anyone in need of a comforting meal. They can choose to bake it right away or save it for a future date when they need nourishment without the effort.
- Effortless Entertaining: Hosting a gathering? Assemble your casserole earlier in the day, freeing you up to enjoy your guests without being tethered to the kitchen.
Crafting Your Make-Ahead King Ranch Chicken Masterpiece: A Step-by-Step Guide
Creating your make-ahead King Ranch Chicken is a straightforward process, built on layers of flavor and designed for convenience.1. The Foundation: Prep and Pan
Begin by preheating your oven to 350°F (175°C) if baking immediately, or simply prepare your baking dish if making ahead. Buttering a 9x13-inch baking dish generously will prevent sticking and contribute to a lovely crust.
2. The Unconventional Yet Brilliant Sauce
This is where King Ranch Chicken gets its unique charm and where some first-timers might pause. Trust the process! In a large bowl, combine your creamy condensed soups (often cream of mushroom and cream of chicken work wonders, offering a rich base) with a can of diced tomatoes and chiles (like Ro-Tel) for that essential Tex-Mex kick. Whisk in chili powder, ground cumin, a pinch of salt and pepper, and a splash of chicken broth. This mixture, while seemingly bizarre on its own, is the secret weapon that transforms into a zesty, creamy, and undeniably delicious binder for the casserole.
3. The Art of Layering
This is where your casserole comes together. The layering ensures every bite is packed with flavor and texture:
- Tortilla Base: Line the bottom of your prepared baking dish with half of your torn corn tortillas. Corn tortillas are traditional and provide a delightful texture, but some variations use tortilla chips for a crunchier result. Tearing them helps them conform better to the dish and absorb the sauce more evenly.
- Shredded Chicken: Layer half of your cooked, shredded chicken over the tortillas. Rotisserie chicken is an absolute lifesaver here, cutting down prep time significantly. You can also roast or boil chicken breasts and shred them.
- Fresh Veggies: Distribute half of your finely diced onion, bell pepper (any color works, but green adds a classic touch), and minced jalapeño (remove seeds for less heat, leave them for more kick) evenly over the chicken. For an extra layer of flavor and softened texture, you can quickly sauté these vegetables before layering.
- Cheesy Goodness: Sprinkle half of your shredded cheese over the vegetables. A blend of Monterey Jack and cheddar is fantastic for both meltability and flavor, but feel free to use your favorite Tex-Mex blend.
- The "Wacky" Sauce: Pour half of your prepared soup mixture over the layers.
- Repeat: Repeat all these layers one more time, starting with the remaining tortillas and ending with the rest of the sauce. Ensure the top layer of sauce is spread evenly.
4. The Grand Finale: Baking and Serving
If baking immediately, cover the dish with foil and bake for 45 minutes. Then, uncover and bake for another 15-20 minutes, or until the casserole is bubbling, the cheese is melted and slightly golden, and the tortillas are tender. Let it rest for 10-15 minutes before serving to allow the layers to set. Serve this hearty dish with a fresh green salad to balance the richness, and prepare for some very happy diners!
Mastering the Make-Ahead & Freeze Strategy
This is where your weeknight hero truly shines.- Refrigerate Ahead (1-2 Days): Assemble the casserole fully as described above, but do not bake. Cover the baking dish tightly with aluminum foil or plastic wrap and store it in the refrigerator for up to 1-2 days. When ready to bake, remove from the fridge, let it sit at room temperature for 15-20 minutes while your oven preheats, then bake according to the instructions above (covered for 45 mins, uncovered for 15-20 mins). You might need to add an extra 5-10 minutes to the baking time if it's still quite cold.
- Freezing for Long-Term Storage (Up to 3 Months):
- Assemble and Freeze Solid: Prepare the casserole completely in your baking dish, but do not bake. Cover it tightly with aluminum foil. Freeze the entire dish until it is solid.
- Wrap and Store: Once solid, you can carefully lift the foil-topped casserole out of the baking pan (this is a great trick if you only have one 9x13 pan!). Wrap the frozen block tightly in another layer of plastic wrap, then an additional layer of heavy-duty aluminum foil. Label clearly with the date and baking instructions. Store in the freezer for up to three months.
- Thaw and Bake: When you're ready to enjoy, remove the plastic wrap and foil (if you removed it from the pan for storage). Place the frozen casserole back into a 9x13-inch baking dish. The crucial step here is to *thaw it completely* in the refrigerator for 24-48 hours before baking. Baking from frozen without thawing can result in an unevenly cooked, watery casserole.
- Bake: Once thawed, bake according to the regular instructions: covered with foil at 350°F (175°C) for 45 minutes, then uncovered for another 15-20 minutes, or until bubbly and heated through.
